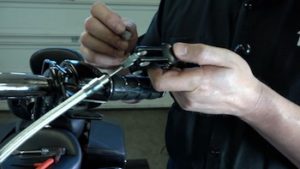
So, here's the scenario. You've got a dead motorcycle battery. You start wondering — is it the battery? Is it the charging system? Maybe it's both. And we all know a trip to a dealership just to diagnose it is going to cost you big time. What if there was a dead-simple, affordable tool that gives you the answer in about 30 seconds? No mechanic, no multimeter, no guessing. That's exactly what we're covering in this video and article. (see video below)
The tool is the OptiMate Cranking Power & Alternator Tester, and it's available right now in the Law Abiding Biker Store. This thing takes all the guesswork out of testing your motorcycle battery and charging system — whether you ride a Harley-Davidson, Indian, Honda, or anything else with a 12-volt system. We're just a bootstrap company of bikers helping bikers, we appreciate every customer, and we'll definitely take care of you. We're not like the big corporate stores. We actually use, test, and install many of the products we carry in the Law Abiding Biker Store and then make helpful videos for the biker community.
Why This Video Exists
Back in 2020, we put out a video showing how to test your motorcycle battery and charging system using a digital multimeter. That method still works, but let's be honest — multimeters can be complicated. You have to know which settings to use, you have to remember what the numbers mean, and most everyday riders don't do it often enough to keep it all straight. The OptiMate tester changes the game. It does one thing and does it very well — it's purpose-built for testing batteries and charging systems. Unlike a multimeter that's designed for a hundred different things, this tool dumbs it all down with color-coded LEDs and simple indicators. Green means good. Yellow means caution. Red means you've got a problem. There are even smiley faces on the back telling you what your readings mean.
 What's in the Box
The OptiMate tester kit comes with everything you need. You get the main tester unit (compact enough to hold in one hand), removable battery clips, and an SAE connector lead. There are two ways to hook it up. You can clip the included leads directly to your battery terminals — red to positive, black to negative. Or you can plug the SAE connector into an installed battery tender pigtail. Most newer Harley-Davidson& Indian motorcycles come with the pigtail or SAE port already installed, so you just plug in and go.
Even better, at the Law Abiding Biker Store we sell the Stealthport, which replaces that dangling battery tender pigtail on your Harley with a clean, sealed, flush-mount connection point. It's made in the USA, and we sell the heck out of them — go check out all the five-star reviews. We've got mid-frame mounts, top mounts between the saddlebag and fender strut, options for bikes with heat deflectors, and more. Every Stealthport listing in the Law Abiding Biker Store has detailed tutorial videos right at the bottom of the page.
A Note About the Newest Model
You'll see a lot of different listings for the OptiMate tester online, but many are an older model. In the Law Abiding Biker Store, we carry the newest version. You can tell by looking at the top of the gauge face — the new model has two green squares labeled Pb and LFP. The older units won't have that. Pb stands for lead (from the Latin Plumbum) and covers all lead-acid batteries — standard, AGM, and GEL. LFP stands for Lithium Iron Phosphate (LiFePO4). When you plug the tester in, one of those indicators will light up, telling you which battery type it's detecting. That matters because lead-acid and lithium batteries have different healthy voltage thresholds, and the tester accounts for the difference automatically.
How Your Motorcycle Charging System Works
Before jumping into the tests, it helps to understand what's going on inside your motorcycle. Your Harley-Davidson, Indian, (and most motorcycles) uses a permanent magnet alternator system with three main components: the stator, the regulator/rectifier, and the battery.
The stator is your power generator. Inside the engine, a flywheel bolted to the crankshaft has magnets embedded around it. As the engine runs, those magnets spin around the stator — a metal core wrapped with copper wire — and that generates electricity. You may hear people call this the “alternator.” On a motorcycle, that usually refers to the whole stator and flywheel package. Even Harley-Davidson calls it that in their manuals.
The regulator/rectifier is basically the traffic cop. The rectifier converts the AC current from the stator to DC for your battery. The regulator monitors the voltage, and if it climbs too high, it shuts off current and bleeds the excess as heat through those cooling fins. If the regulator fails, it can send too much voltage to your battery and destroy it. Generally speaking, 14.6 volts is the hard regulation point on most 12-volt systems, including Harleys.
The battery stores all the power. The stator system keeps it charged while you ride. You could actually ride for a while with a failed stator because the battery has reserve power, but eventually it would die and leave you stranded.
The simple loop to remember: stator generates power → regulator/rectifier converts and regulates it → battery stores it and powers everything on the bike.
Car vs. Motorcycle Charging Systems
People often wonder how a motorcycle charging system compares to a car. In a car, the alternator is belt-driven off the engine and the regulator/rectifier is built right inside — one self-contained unit. On a motorcycle, the stator sits inside the engine driven by magnets on the flywheel (no belt), and the regulator/rectifier is a separate component mounted on the frame. Same basic job, different setup. The OptiMate tester works on all of them — cars, motorcycles, ATVs — anything with a 12-volt system.
A Quick Word on Lithium Batteries
The OptiMate tester works with both lead-acid and lithium batteries, and it knows the difference. A good lead-acid AGM reads above 12.4 volts. A good lithium reads above 13.1 volts. The tester accounts for that automatically.
On the topic of lithium in newer Harley-Davidsons — I have firsthand experience with a lithium battery on my 2024 Street Glide. During a long trip, the bike went completely dead on a busy freeway near Greensboro, North Carolina, and had to be swapped to a lead-acid roadside. I reached out directly to Harley-Davidson, who confirmed that lithium batteries are not approved for Revolution Max and center-cooled models due to the electrical system and software. There's a detailed video on this topic — definitely go watch it if you're considering lithium on a 2024 or newer Harley.
The Three Tests — Using the OptiMate Tester
This is the good stuff. The OptiMate lets you analyze your battery and charging system in three easy steps. Connect it and you'll have your results in about 30 seconds.
Step 1: OFF — Check Battery Charge Level
With the ignition off and engine off, plug the tester in. It's best to test when the battery and engine are at their coldest because the battery works hardest when it's cold. The tester reads your resting battery voltage and lights up the LEDs.
What to look for: a lead-acid standard battery should be above 12.2 volts. A lead-acid AGM should be above 12.4 volts. A lithium LiFePO4 should be above 13.1 volts. A solid green LED means your battery is holding a charge above 12.5 volts — that's great for lead-acid. A flashing green means a lithium battery is above 13.2 volts, which is normal. A solid red above 12 volts is okay but not great. A red light below 11.5 volts means a bad battery and you should expect a poor start.
Note that when you turn the ignition on, voltage may drop toward 12 volts — that's normal because you're powering up accessories, the infotainment system, and headlights.
Step 2: START — Record Lowest Cranking Volts
Leave the tester connected and start your engine. The tester automatically records the lowest voltage during cranking, and it holds that reading for 20 seconds so you can read it easily. This is the strongest indication of whether your battery can deliver enough power. The battery works hardest the instant the starter motor engages.
What to look for: 9 volts or above gets a smiley face — very good. 10 volts or higher is excellent. 7 volts or above is a neutral face — marginal. Below 7 volts is a sad face — bad battery, and the LED will flash. Expect slightly lower readings in colder temperatures, with a minimum of 8 volts being the target.
Step 3: RUN — Verify Charging Voltage
With the engine running, the tester automatically switches to show charging voltage on the RUN side of the gauge. Rev the engine up and the tester shows the highest voltage your charging system is producing.
What to look for: below 13 volts is very low and you have a serious charging issue. Below 14 volts is low and you can expect less starting power over time. Between 14 and 14.5 volts is the sweet spot — smiley face, battery should perform well. Above 14.5 volts is an overcharging warning.
If the regulator is working properly, you should see voltage increase from around 12.8 to 13.2 volts at idle and climb to around 14.6 volts when revved up. If you're seeing above 15 volts, you likely have a bad regulator. Riding like that will destroy a lead-acid battery, and a lithium battery may swell and burst.
So, Is It the Battery or the Charging System?
This is the whole point. If steps one and two look bad but step three looks good — it's your battery and it's time for a new one. If steps one and two look fine but step three shows low or no charging — it's your charging system, likely a stator or regulator/rectifier issue. If everything looks bad across all three steps, it could be both, but start with the battery and then retest. Either way, you've got the answer without paying a dealership to tell you.
For a much deeper dive into Harley-Davidson charging systems — stators, regulators, rectifiers, and more — check out Law Abiding Biker Podcast Episode #134, where I interviewed Evan Grist, an electrical engineer affiliated with RMSTATOR. You can listen on any major podcast platform.
Battery Maintenance Tips
The best thing you can do for your motorcycle battery is keep it on a battery tender when you're not riding — even during summer months if the bike sits for a couple of days. At the Law Abiding Biker Store, we carry the OptiMate 2 Duo battery tender as well as the Deltran Battery Tender Junior. The OptiMate 2 Duo is my personal choice because it's a smart tender with readout lights that tell you the battery's status at a glance. Just walk by, take a look, and you'll know everything is good before your ride.
The worst thing you can do is let your battery sit for long periods without being on a tender. Batteries are expensive — why not maintain yours properly so it lasts longer? There's a detailed video on battery tenders and maintenance if you scroll to the bottom of any of our battery tender listings in the Law Abiding Biker Store.
Watch the Full Video
Scroll down below to watch the complete video where I walk you through every step with the OptiMate tester on my Harley-Davidson Street Glide, explain the charging system, and demonstrate all three tests in real time.
Get Yours at the Law Abiding Biker Store
The OptiMate Cranking Power & Alternator Tester, the Stealthport, the OptiMate 2 Duo battery tender, and everything else mentioned in this video are available at the Law Abiding Biker Store. We're a bootstrap company of bikers helping bikers, we appreciate every customer, and we'll definitely take care of you. We're not like the big corporate stores. We actually use, test, and install many of the products we carry in our store and then make helpful videos for the biker community. Free shipping on orders over $100, and no sales tax if you live outside Washington State.
Join the Free Email Club!
If you appreciate this free information make sure to join the thousands of law abiding bikers that have already joined the free Email Club! You will be notified of new useful motorcycle content and techniques as we put them out. Join the Community now!