-
Save money now! Install aftermarket handlebars on your Harley Davidson yourself!
-
Fact: Dealerships can charge $1,000 and up for this project
-
Do it in your garage or on your patio right on the kickstand!
-
Trick your Harley out the way you want it!
-
No special motorcycle lifts or jacks needed!
-
Have the pure satisfaction of working on your own Harley!
Videos by Bikers for Bikers!
Watch the below video to learn which of the 4 install videos is right for you!
The 4 below handlebar install videos will have you covered for an array of different years and models of Harley's!
TESTIMONIAL:
Jason of Lake Tapps, Wa says:
I'm not sure whether you keep customer feedback for marketing purposes, but I thought I'd send a note about my experience with your handlebar install video. I recently purchased your video and installed 14″ Carlini Gangster apes on my 2005 Road King Classic with all new braided stainless cables and wiring extension. I'm no wrench by any stretch of the imagination, so this was the most significant project I've ever done to my bike. Thanks to your video, and your attention detail, the project went very well and I just wrapped everything up. I never would've come close to completing this project on my own without your video…very nicely done! Even better, I probably saved over a thousand bucks!
I GUARANTEE YOU CAN DO IT!
Choose the video below that is best suited for your particular handlebar install project.
*You won't find more thorough and detailed tutorial videos on how to install aftermarket handlebars on your Harley Davidson. We cover everything for you!
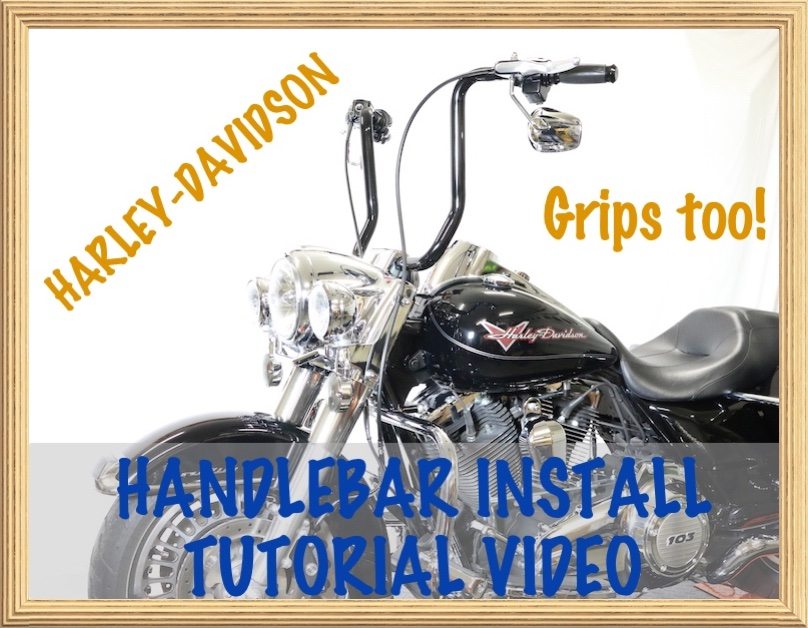
Handlebar kit & bars we used
- Burly Handlebar Cable Installation Kit For Harley
- Cycle Smith Bagger Apes 16″ (our bars fit 2008-later)
You absolutely do not have to use the same kit or bars we used in the tutorial video. They all wire and go on the same way. Please consider using the below affiliate links to purchase your bars and install kit.
Revzilla | Amazon | Cruiser Customizing | Cycle Parts
Basic tools & items needed
Tools & items needed: (affiliate links)
- Screwdrivers (standard & phillips)
- Torx head wrenches (standard sizes)
- Standard box end wrenches (American & Metric)
- Wire strippers (a pocked knife could be used instead)
- Pliers (standard & needle nose)
- Butane mini torch or just a standard lighter
- Allen/Hex head wrenches (American)
- Transmission oil (one quart)(replacement if you have to put extended clutch cable or hydraulic clutch lines on)
- DOT 4 brake fluid (if replacing with extended brake lines)(for bleeding lines)
- Transmission cover gasket (If you have to put extended clutch cable or hydraulic lines on)
- A simple hand operated brake line bleeder vacuum pump
- Basic 40W soldering iron kit
- Solder
An easy to follow step-by-step tutorial video-NO FAIRING-TOURING
Install Handlebars-NO FAIRING-TOURING
Handlebar kit & bars we used
- Burly Handlebar Cable Installation Kit For Harley
- Cycle Smith Bagger Apes 13″
You absolutely do not have to use the same kit or bars we used in the tutorial video. They all wire and go on the same way. Please consider using the below affiliate links to purchase your bars and install kit.
Revzilla | Amazon | Cruiser Customizing | Cycle Parts
Basic tools & items needed
Tools & items needed: (affiliate links)
- Screwdrivers (standard & phillips)
- Torx head wrenches (standard sizes)
- Standard box end wrenches (American & Metric)
- Wire strippers (a pocked knife could be used instead)
- Pliers (standard & needle nose)
- Butane mini torch or just a standard lighter
- Allen/Hex head wrenches (American)
- Transmission oil (one quart)(replacement if you have to put extended clutch cable or hydraulic clutch lines on)
- DOT 4 brake fluid (if replacing with extended brake lines)(for bleeding lines)
- Transmission cover gasket (If you have to put extended clutch cable or hydraulic lines on)
- A simple hand operated brake line bleeder vacuum pump
- Basic 40W soldering iron kit
- Solder
An easy to follow step-by-step tutorial video-WITH FAIRING-TOURING
Install Handlebars-WITH FAIRING-TOURING
Handlebar kit & bars we used
- Burly Handlebar Cable Installation Kit For Harley
- WO614 CHUBBY® 14″ OUTLAWZ APE HANGER (Wild 1 Inc.)
- Roland Sands 4-Bolt Nostalgia Risers For Harley
- For 1″ handlebars (The above bars reduce down from 1 1/4″ to 1″ at the risers)
You absolutely do not have to use the same kit or bars we used in the tutorial video. They all wire and go on the same way. Please consider using the below affiliate links to purchase your bars and install kit.
Revzilla | Amazon | Cruiser Customizing | Cycle Parts
Basic tools & items needed
Tools & items needed: (affiliate links)
- Screwdrivers (standard & phillips)
- Torx head wrenches (standard sizes)
- Standard box end wrenches (American & Metric)
- Wire strippers (a pocked knife could be used instead)
- Pliers (standard & needle nose)
- Butane mini torch or just a standard lighter
- Allen/Hex head wrenches (American)
- Transmission oil (one quart)(replacement if you have to put extended clutch cable or hydraulic clutch lines on)
- DOT 4 brake fluid (if replacing with extended brake lines)(for bleeding lines)
- Transmission cover gasket (If you have to put extended clutch cable or hydraulic lines on)
- A simple hand operated brake line bleeder vacuum pump
- Basic 40W soldering iron kit
- Solder
An easy to follow step-by-step tutorial video-NON-TOURING-SOFTAIL, DYNA, SPORTSTER
Install Handlebars-NON-TOURING-SOFTAIL, DYNA, SPORTSTER
Parts, Kits, & Bars we used | Important Information
- Burly Handlebar Cable Installation Kit For Harley (affiliate link)
- NOTE: At the time of this video, Burly had no kit for our 2016 Dyna Low Rider S we used in this video. (specialty bike)
- We did a custom cable order for this project (see below for more info)
- However, Burly does have cable/wire kits for many other years and models of Harley's, so make sure to check.
- West Coast MX 12″ T-Bars (black)
- Please tell them Law Abiding Biker™ Media, Inc sent you
- Arlen Ness Polyurethane Riser Bushing Kit For Harley (affiliate link)
- Drag Specialties Turn Signal Fork Clamp-49mm – 2040-1127 (black)
Custom Cables and ABS Brake Blocks you can use:
- Clutch cable, upper ABS brake line, & front ABS brake block
- Magnum Shielding (black pearl)
- NOTE: This is where we ordered our ABS brake block with lines for this project
- Other options for front ABS brake block (this would work too)
Additional Information:
Stock 2016 Dyna Low Rider S stock cable lengths
**Our Measurements (always measure yourself)
- Stock clutch cable= 60 inches
- Stock upper ABS Upper Brake Line= 23 inches
Stock 2016 Dyna Low Rider S handlebars/risers= 6 inch risers
- We installed 12-inch Westcoast MX T-bars
- We ordered +8 inches over stock cable/line length
- It worked out just fine
- Now that we have done this project, we can tell you that ordering 6″ over would have worked just fine too. We have some extra cable.
- We ordered +8 inches over stock cable/line length
You absolutely do not have to use the same kit or bars we used in the tutorial video. They all wire and go on the same way. Please consider using the below affiliate links to purchase your bars and install kit.
Revzilla | Amazon | J&P Cycles

Basic tools & items needed
Tools & items needed: (affiliate links)
- Screwdrivers (standard & phillips)
- Torx head wrenches (standard sizes)
- Standard box end wrenches (American & Metric)
- Wire strippers (a pocked knife could be used instead)
- Pliers (standard & needle nose)
- Butane mini torch or just a standard lighter
- Allen/Hex head wrenches (American)
- Transmission oil (one quart)(replacement if you have to put extended clutch cable or hydraulic clutch lines on)
- DOT 4 brake fluid (if replacing with extended brake lines)(for bleeding lines)
- Transmission cover gasket (If you have to put extended clutch cable or hydraulic lines on)
- A simple hand operated brake line bleeder vacuum pump
- Basic 40W soldering iron kit
- Solder
An easy to follow step-by-step tutorial video-NON-TOURING-DYNA, SOFTAIL, SPORTSTER
Install Handlebars-NON-TOURING-DYNA, SOFTAIL, SPORTSTER
Harley Handlebar Projects-Before & After Pics
Stock Harley Road King Handlebars (Before)
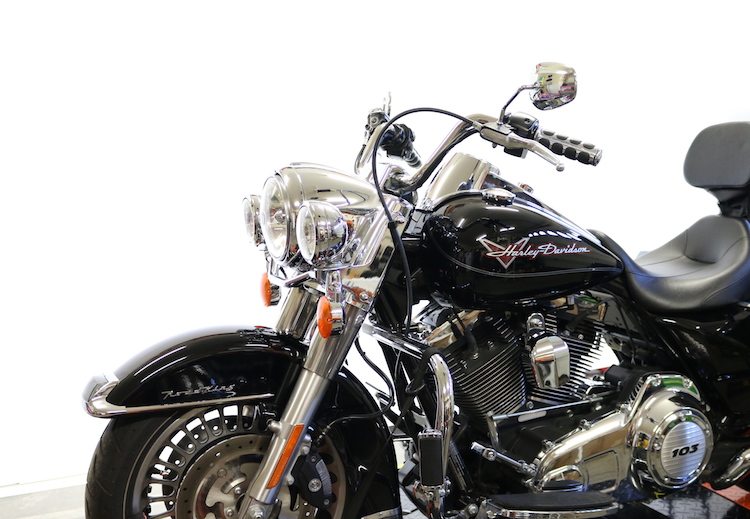
16 inch Ape Hangers Touring-No Fairing (After)
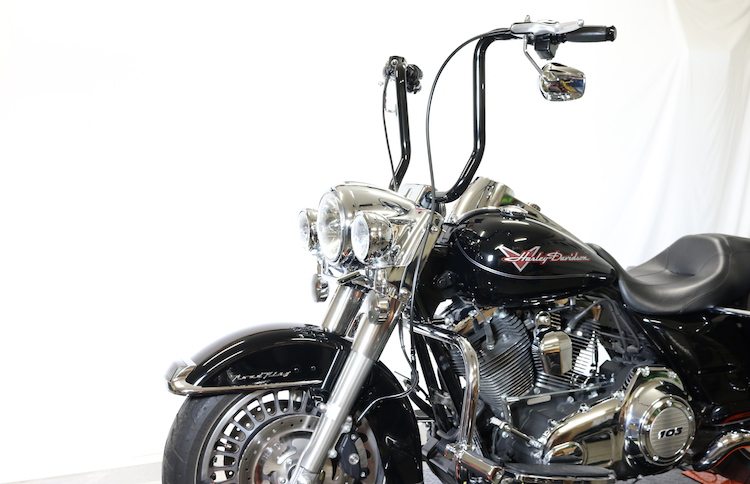
Stock Harley Touring Handlebars (Before)
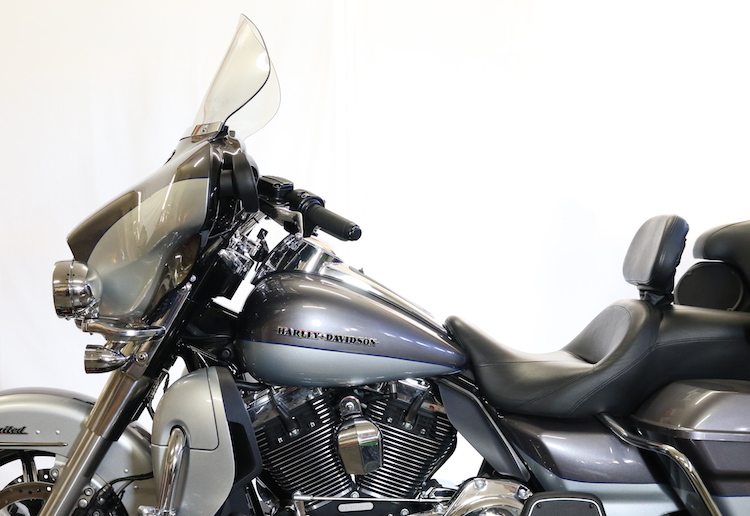
13 inch Tall Aftermarket Handlebars (After)
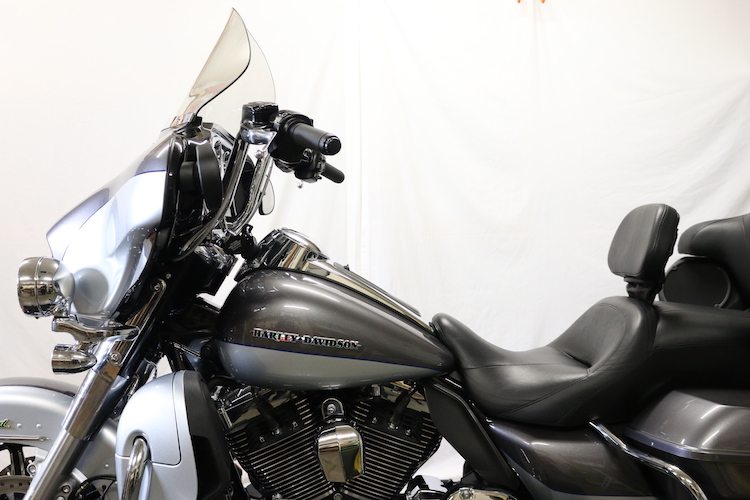
Basic Harley Drag Bars Softail (Before)
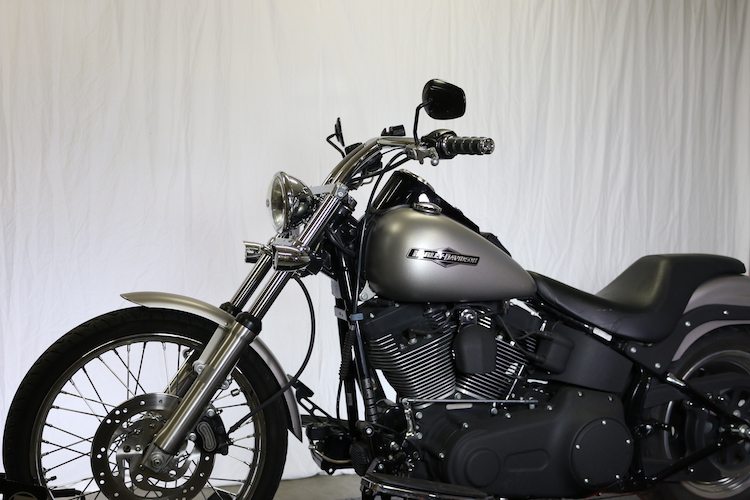
14 inch Tall Aftermarket Handlebars (After)
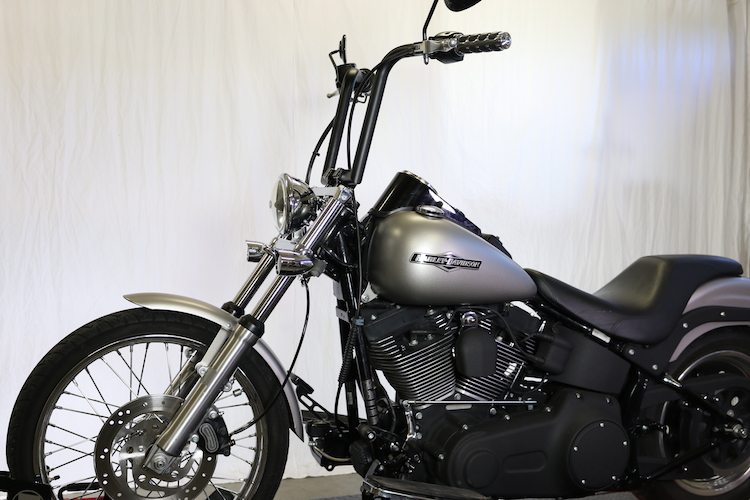
Stock Dyna 6" Handlebars (Before)
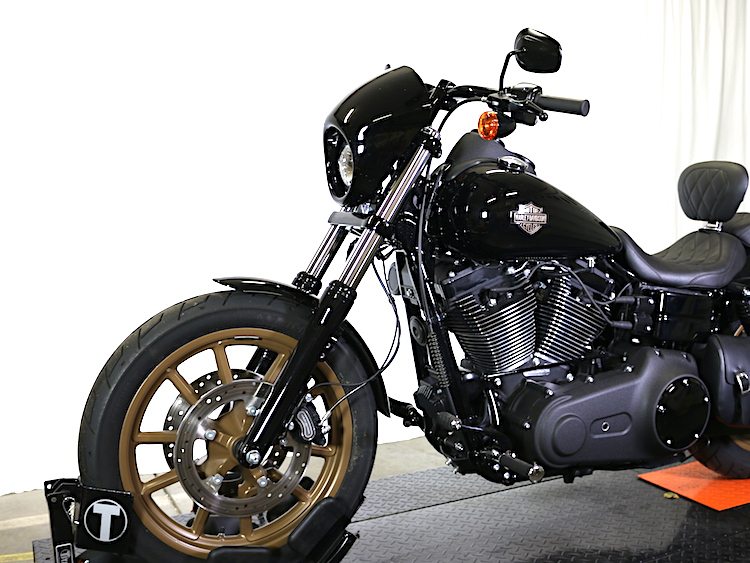
12 inch Tall MX T-Bars (After)
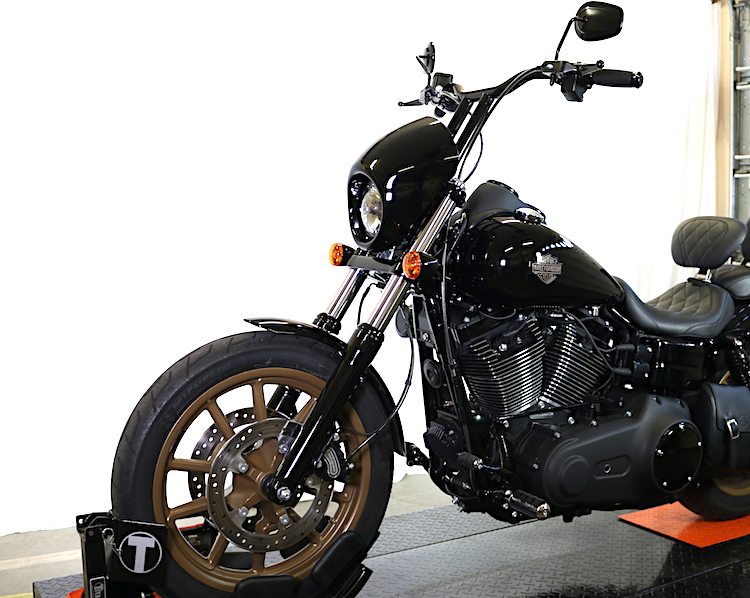
Purchase handlebars & wire/cable kits through our affiliates!
Revzilla | Amazon | J&P Cycles
New Handlebar Projects & Tutorial Videos Coming!