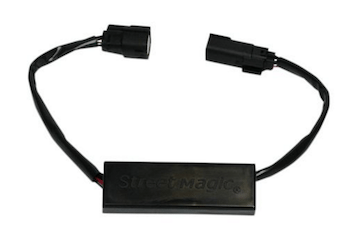
 In this video, I review and show you how to install a Custom Dynamics Strobe Brake Light Modulator on a Harley-Davidson touring motorcycle. This module allows you to select up to 9 individual strobe patterns that will emit from your rear LED brake lights when you apply your front or rear brake on your motorcycle. This greatly reduces the risks that you will get rear ended. It grabs the attention of that cage driver behind you that is not paying attention and might even be texting. We need all the help we can get when it comes to making the motoring public more aware of us on motorcycles.
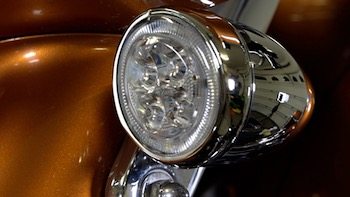
***This Custom Dynamics Strobe Modulator will not work with your stock Harley halogen bulbs. You'll need to convert your old halogen bulbs to an LED system. This is super easy by just installing plug and play Ciro 3D Fang LED Signal/Brake insert lights. Take out your halogen bulb and plug in the new LED's!! Good to go.
**GET CIRO 3D FANG LED SIGNAL/BRAKE INSERT LIGHTS IN OUR STORE HERE
CIRO 3D FANGS COME IN BLACK OR CHROME!!
SEE OUR DETAILED VIDEO ON THE CIRO 3D FANG LED'S HERE
**GET THE CUSTOM DYNAMICS MODULATOR I USED IN THIS VIDEO HERE (AFFILIATE LINKS)
REVZILLA LINK FOR CUSTOM DYNAMICS STROBE MODULATOR
BECOME A PATRON MEMBER AND GET BENEFITS
CHECK OUT OUR AWESOME FOR PURCHASE MOTORCYCLE TUTORIAL VIDEOS
GET A CIRO 3D SHOCK AND AWE LED LIGHTING KIT FOR YOUR HARLEY IN OUR STORE
GET FORK MOUNTED LED ILLUMINATORS
GET BUGSLIDE WATERLESS MOTORCYCLE CLEANER IN OUR STORE HERE
**BUGSLIDE IS TRUSTED & USED BY POLICE MOTORS OFFICERS WORLDWIDE!!
This Custom Dynamics Strobe Modulator is really easy to install and is plug and play. I show you exactly how and where to plug the unit in on your Harley touring model.
I show you how to set the two switches on the modulator and how to adjust the 9 different strobe patterns. You can watch the pattern I selected and see how it looks.
Note: Make sure to disconnect the negative side of your battery before installing for safety. Also, turn your ignition off when selecting new strobe patterns. Then turn your ignition back on and test to see if you like the pattern.
Join the Free Email Club!
If you appreciate this free information make sure to join the thousands of law abiding bikers that have already joined the free Email Club! You will be notified of new useful motorcycle content and techniques as we put them out. Join the Community now!

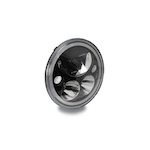
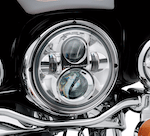 The Harley Daymaker LED headlight is the most expensive and way overpriced. Well, because that's standard practice for Harley. Don't get me wrong, it's a great headlight & I doubt anyone would be disappointed with the performance. It came in second place in my testing. Here is what Harley says about it.
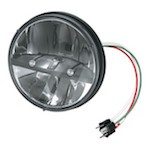 The Kuryakyn Phase 7 LED is a good LED headlight for Harley and comes in at a price way less than the Vision X and Daymaker at only $270. I ran the Phase 7 LED on my Harley Street Glide Special for several years before being introduced to the Vision X. I never wanted to pay Harley for their overpriced Daymaker. I even did a