Videos By Bikers For Bikers
[/vc_cta_button2]
If you want to stay up to date on all Harley Davidson Boom!™ Box updates and issues then subscribe to the free Law Abiding Biker Email list below:

Harley Davidson and Harman Kardon just released Boom!™ Box software update version 1.21.2.1 on August 7, 2017. This comes after software update versions 1.21.0.4 that was released in March 2017. We have received many inquiries from bikers asking if they should update to this latest version. It is always a good idea to wait and see if an update fixes more than it breaks and let me have some time to test things.
Note: This particular update if for the Boom Box 4.3 Standard, 6.5T Premium, and the CVO 6.5GT systems. I give the go ahead to update to this new Boom Box software  update version, 1.21.2.1.
I installed and tested this update for you. As usual, don't expect any miracles and that suddenly all things will be fixed for ever user. They still have a long way to go to get rid of all the problems that persist with the Harley Boom!™ Box Infotainment System. We are all skeptical that they'll ever get the Boom Box working perfectly at this point.
FAQ:
Question: If I get behind on updating my Boom Box software, will I have to go back and install each past update I missed?
Answer: No, you do not have to update incrementally. If you get behind, just grab the latest software update here and install it. It will update everything you need including past updates. There is no access to the older updates from the Harley website anyway.
Question: If I update my Boom Box to the newest software version and don't like it or it brakes things, am I stuck with it?
Answer: No, as long as you have been saving each Boom Box update file somewhere you're fine. You can go to a past software update file and install that over the new update version (downgrade). Keep all software versions and updates as Harley does not post or give access to older versions.
Resources & videos:
-
Harley Boom Box Software Update Version 1.19.0
-
Harley Boom Box Software Update Version 1.19.1
-
Harley Boom Box Software Update Version 1.19.1.1
-
Harley Boom Box Software Update Version 1.19.1.2
-
Harley Boom Box Software Update Version 1.19.2
-
Harley Boom Box Software Update Version 1.20.1
-
Harley Boom Box Software Update Version 1.20.2 (Siri Integration)
-
Harley Boom Box Software Update Version 1.20.3
-
Harley Boom Box Software Update Version 1.21.0.4
Remember; The Harley Boom!™ Box still has many annoying bugs and problems, so don't expect this software update to suddenly fix everything.
If you don't know how to properly update your system software and maps then check out my Official Boom!™ Box Software Update Video.
>
This update claims to fix the following: (1.21.2.1)
Issues Fixed:
Date Released: 08/07/2017
Fixes
- Siri not initiating in some instances with long press of VR (Voice recognition) button
- VR cancelling Siri initiation despite activation through button press.
- VR initializes prior to Siri initiation.
- Global presets from USB device grayed out in display despite USB device plugged in.
- Global presets are highlighted even after USB device is removed.
- Scroll down button selects last item in media list in some instances.
- Squelch pop up not shown properly in all instances after squelch button activation.
- Map database names in some international regions were not fully displayed.
- Next turn shown on weather map in some instances.
- Various bug fixes.
D ownload Update
Note: If you aren't using Harley Davidson's Ride Planner to integrate with your Boom!™ Box system then you are [Read more…]
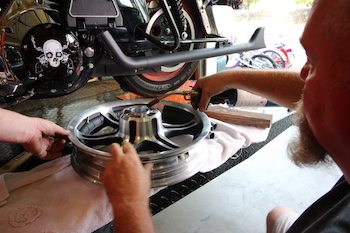 Video-In this completely free video, we show you how to install new wheel bearings in your motorcycle wheel right in your very own shop or garage. No need for an expensive wheel bearing press. You can use a piece of 2×4, butane torch, grease, and hammer. Why pay a shop or dealership to install your motorcycle wheel bearings when it's simple to do yourself after you watch this video?


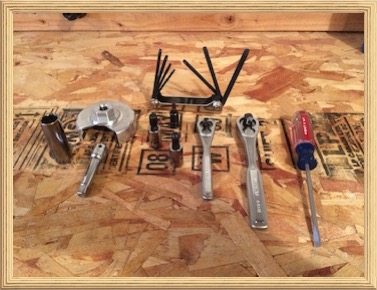
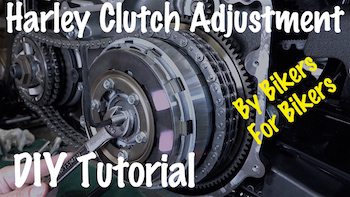 Video-In this completely free DIY video we show you how to adjust your Harley-Davidson clutch internally. We'll also give you a good look behind the primary cover. You actually only need to remove your

 We are Live showing you how we are removing a tire from a Harley motorcycle rim ourselves right in our own garage. No need to pay a dealership or shop to do this. With a simple manual tire removing device you too can easily remove and install your own tires on your Harley motorcycle rim. We are filming this and will show you all the tips and tricks in an upcoming release on this channel, so make sure you're subscribed.
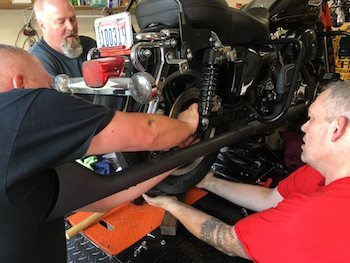
 Video-In this completely free tutorial video we show you how to install a Harley brand stage-one air intake on a Harley-Davidson touring model equipped with the Milwaukee-Eight motor. Yes, you'll need to re-map your electronic fuel injection (EFI) after you install a stage-one air intake. We make it simple using the